There are three different ways to create users: manually create users, invite users, or upload them via a CSV.
Note: Only admins, owners, and support roles can add users to an account.
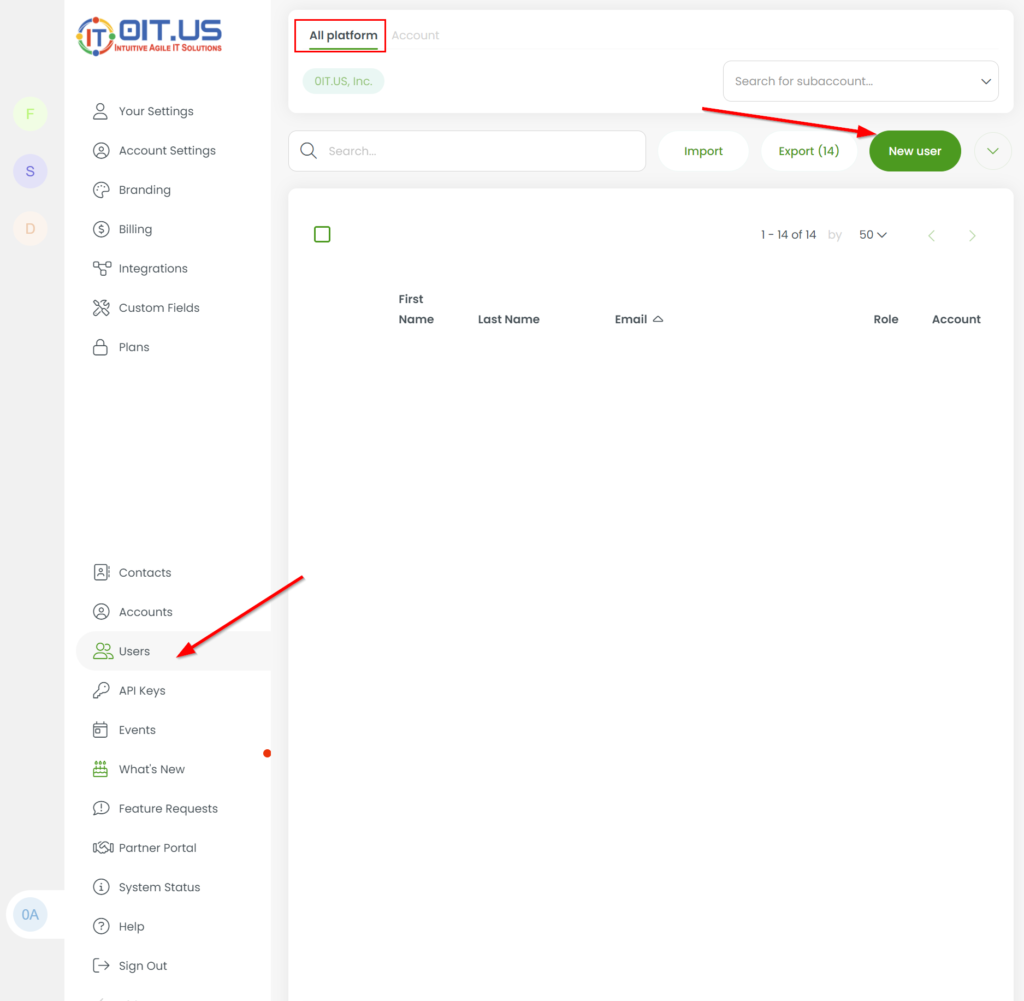
First, login to your admin account.
Click the “users” option on the left panel, then click the “new user” button on the top right:
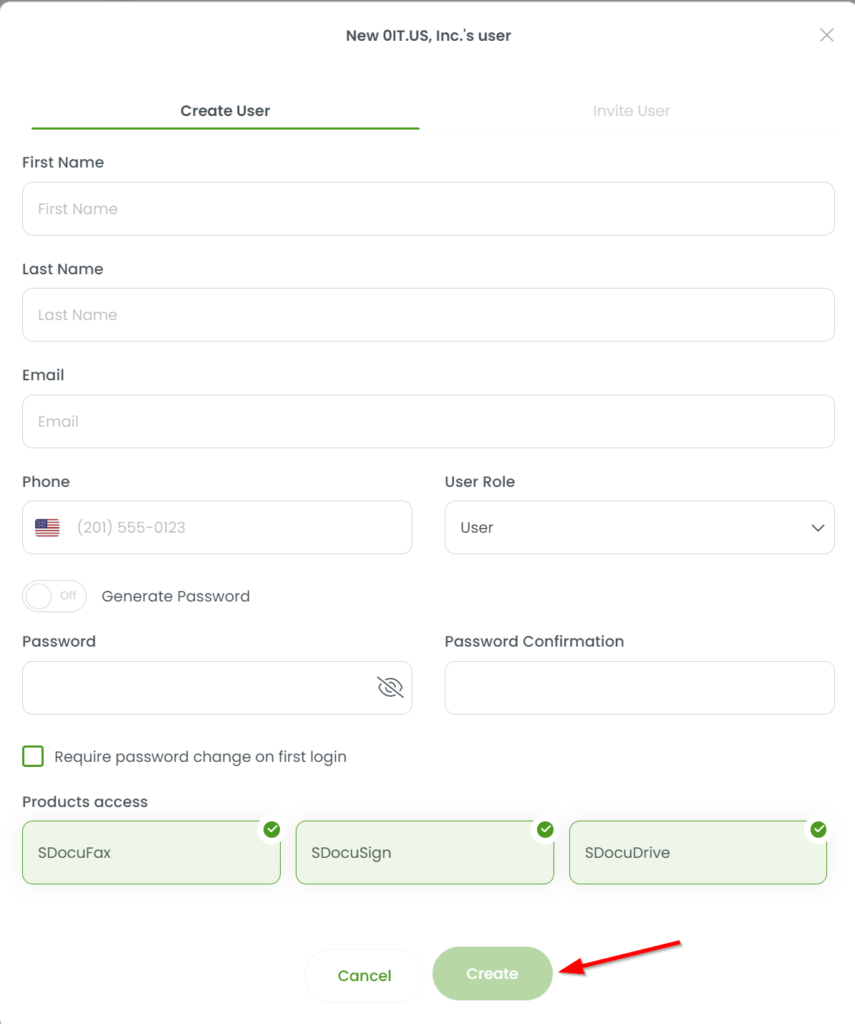
Create User #
Enter the new user information into the fields, choose the user role, choose the product access they should have, and then click the “create” button.
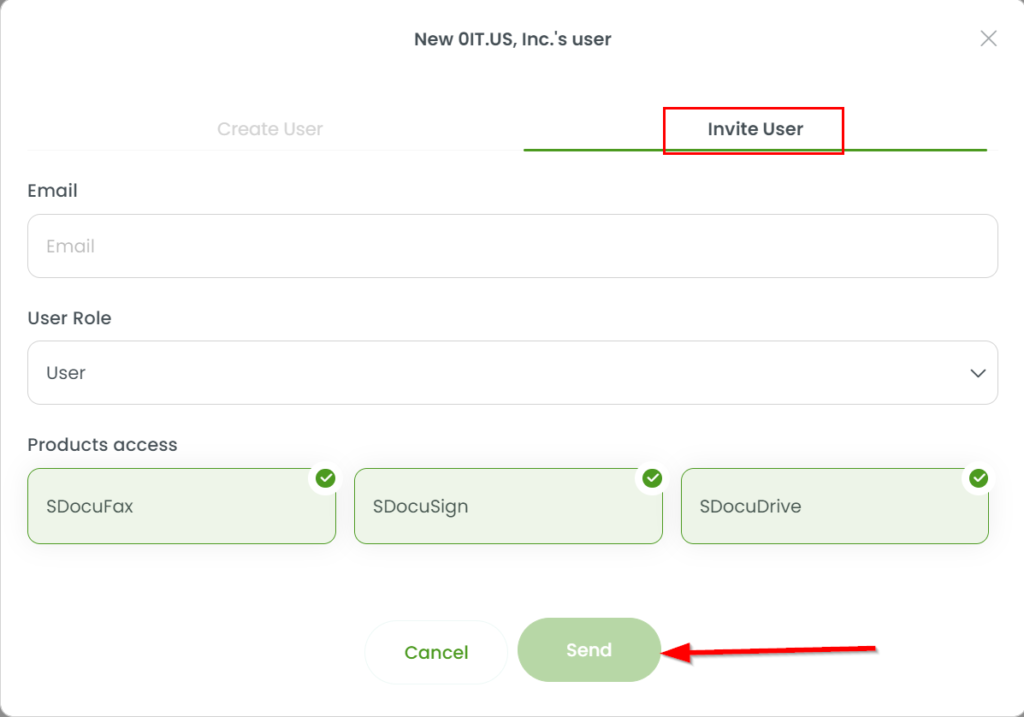
Invite a User #
You can invite a user by adding their email address, selecting their user role, and adding their product access. From here, they’ll receive an email to set up their user under your account.
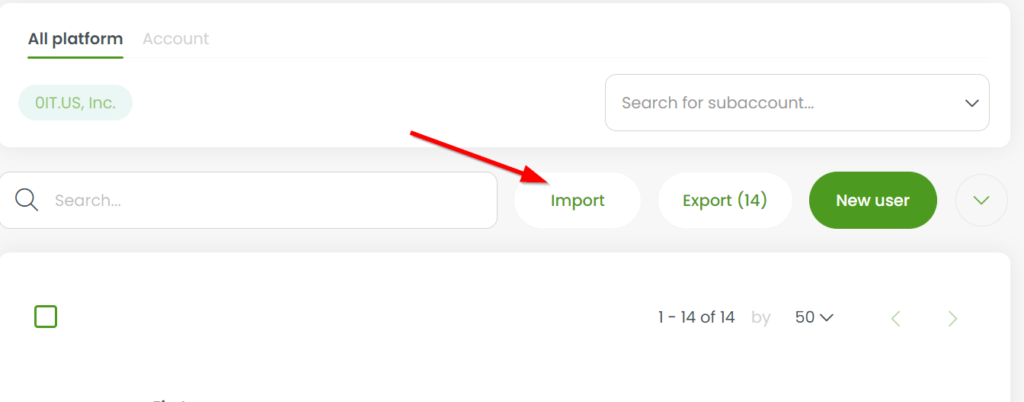
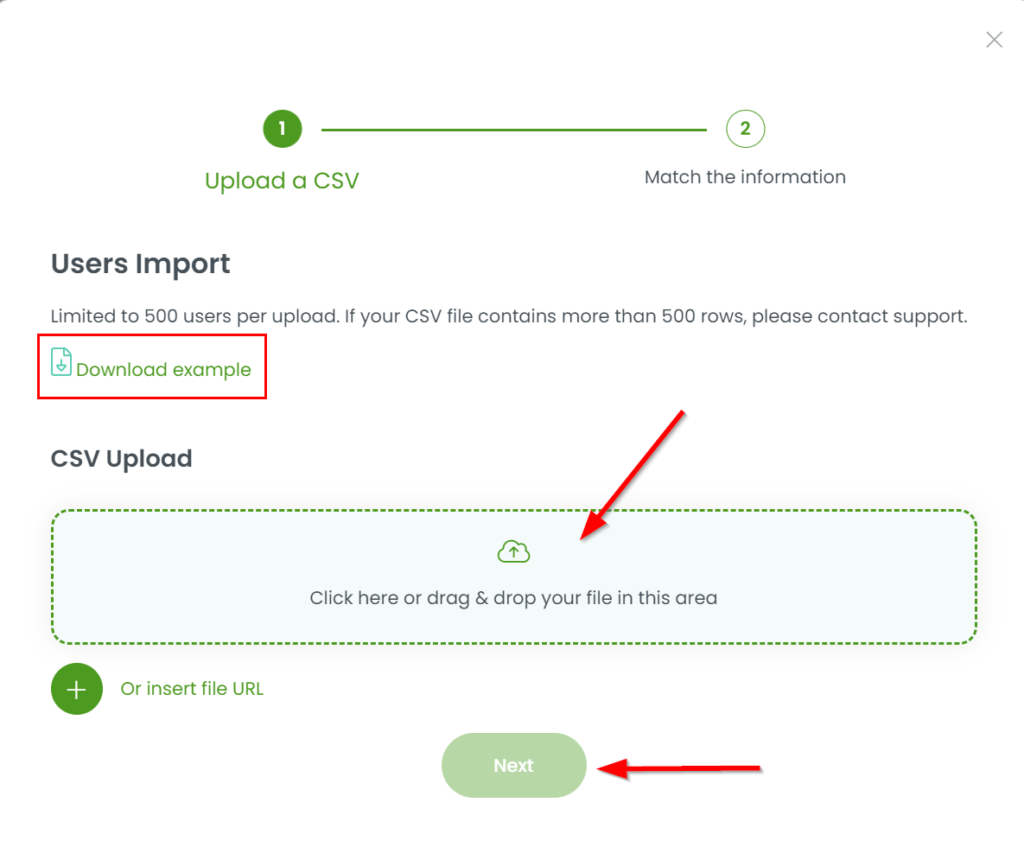
Import Users #
First, click the import button:
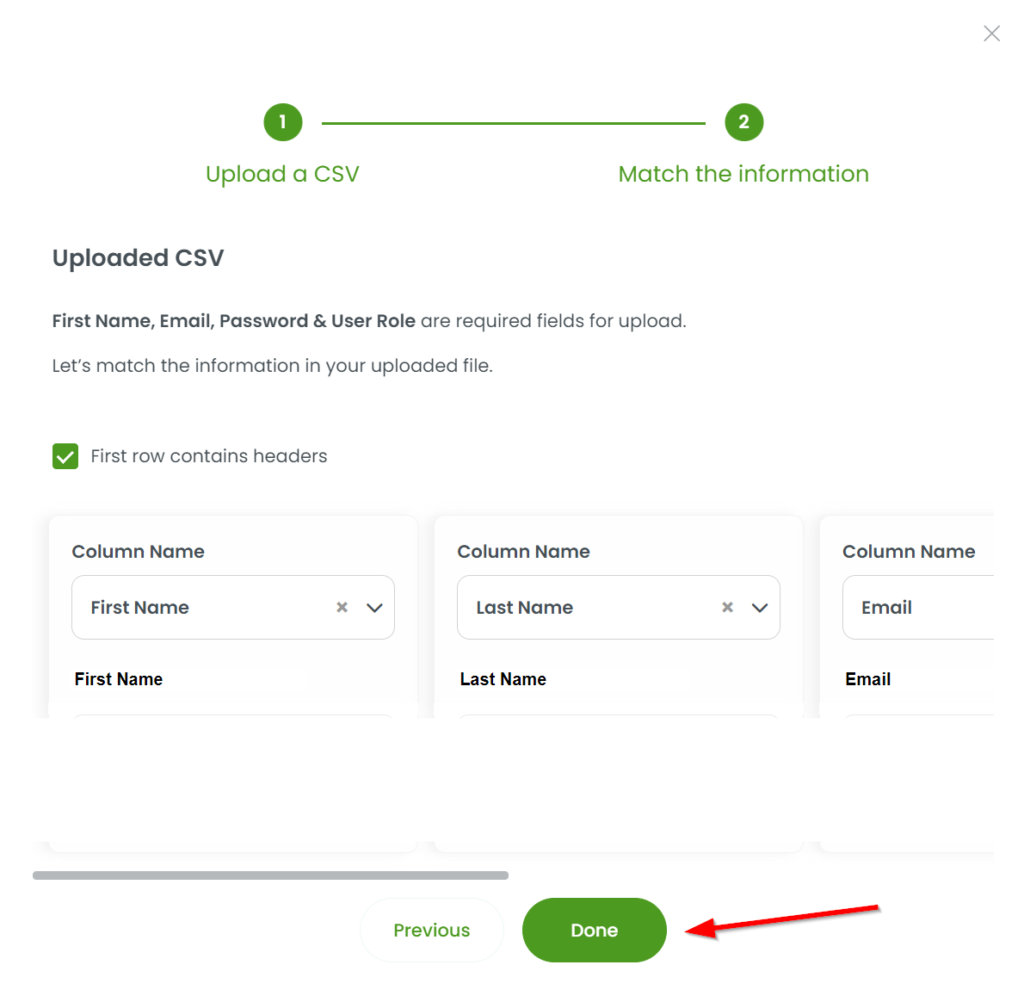
You can upload a CSV with a maximum of 500 users. The columns that must be included in your CSV are first name, email, password, and user role. You can also download an example CSV. Once your CSV is uploaded, click “next”. If the first row of your CSV includes the headers, keep this box checked. Lastly, click done, and your users will be added to your portal.
Other options that can be added on the CSV:
Header Value
Fax Caller ID 11 digit number
Fax CS ID Text
Sign True/False
Drive True/False
Fax True/False
Password Temporary True/False
Note: The user’s email address will be their username in the system.
If you have any other questions, please reach out to support@0it.us


